Docker commands you should know.
This post covers the docker commands you should familiar with. Dockerfile, Docker compose commands are not covered here.
Docker overview
Docker is an open platform for developing, shipping, and running applications. Docker enables you to separate your applications from your infrastructure so you can deliver software quickly. With Docker, you can manage your infrastructure in the same ways you manage your applications. — Docker Docs
Docker version
docker --versionTo check the docker version.
Pull images
To pull an image from a registry,
docker pull <image_name:tag>
docker pull <image_name@digest>
I have pulled the httpd image, by default if we didn’t specify the tag then docker will use the latest tag.
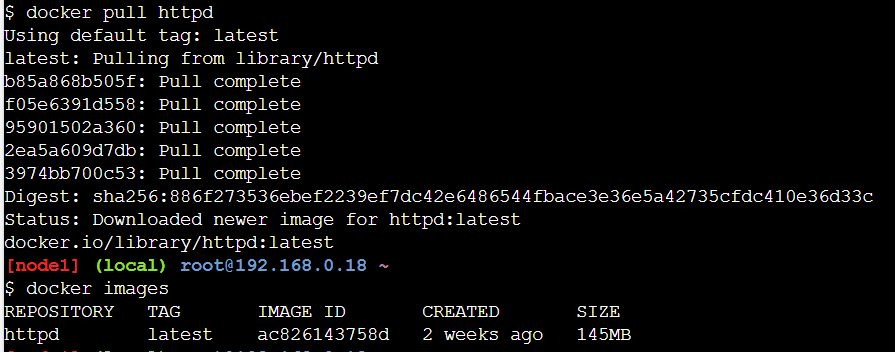
We can find the supported tags for that image in the Docker hub repository or any other docker registry where the image is located.


We could also pull the image with the digest. Find the digest for the image from the dockerhub repository.


Note that the images pulled with the digest and has the tag as <none>.
Remove images
To remove images,
docker rmi <image_name:tag>
docker rmi <image_id>
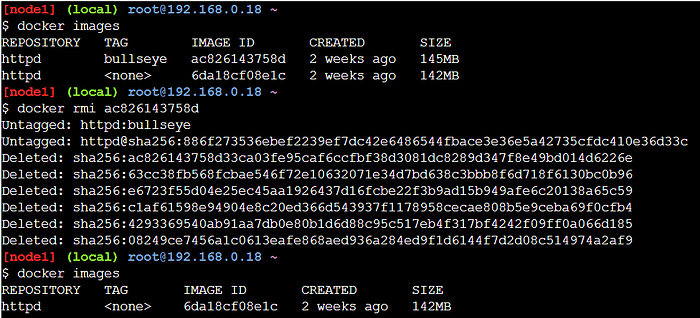
To remove the image with the digest,
docker rmi <image_name@digest>To find the digest of the image, use the below command
docker images --digests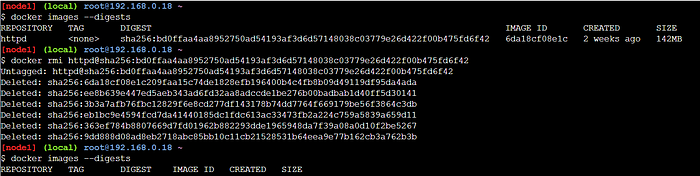
Run the container
To run the container from the image
docker run -d <image>If the image is not already pulled (or if the image is not present locally) docker will try to pull that image from the docker registry.
-d is used to detach the std in/out/err in the background.

-it option is used to run the container interactively

The downside of the -it option is that, once we exit the interactive session the container will be stopped.
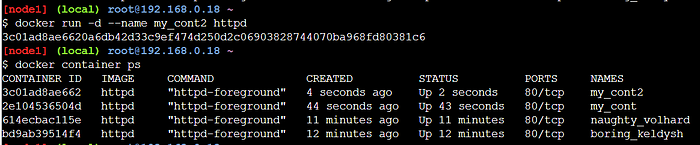
To name our container,
docker run -d --name=<ur_container_name> <image>
docker run -d --name <ur_container_name> <image>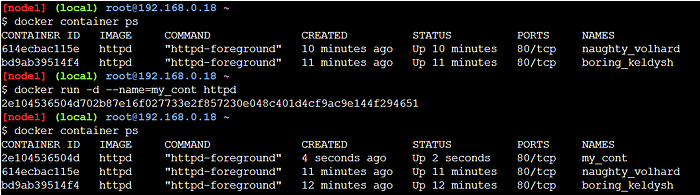
To map the docker host’s port with the container’s port,
docker run -d -p <host_port>:<container_port> <image>
We can use restart option to set the restart policy of the container. (default is no)
docker run -d --restart always <img>always makes the container to start itself when some crashes happens to the container or the server in which the docker is running.
To set the environmental variable,
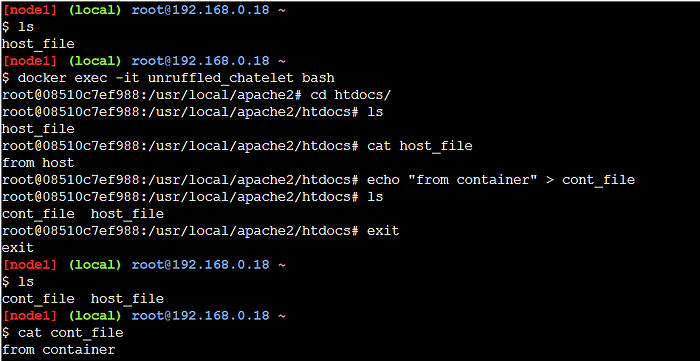
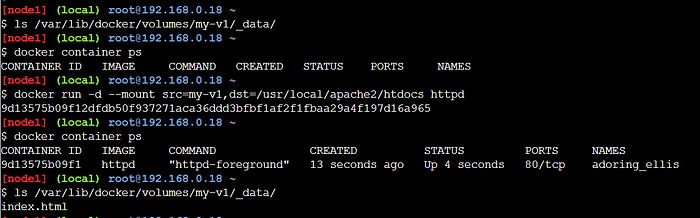
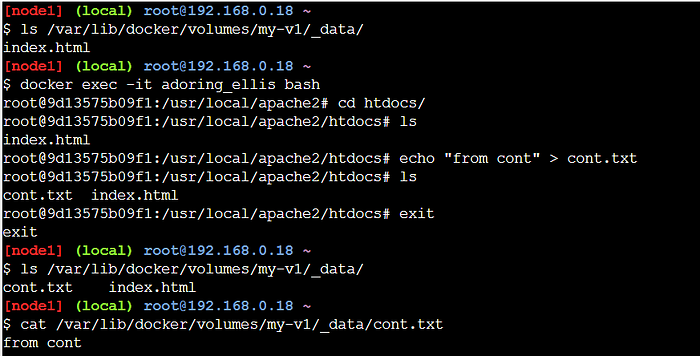
docker run -d -e FOO=foovalue <img>To mount the volume to the container,
docker run -d -v <host_dir_path>:<container_dir_path> <image>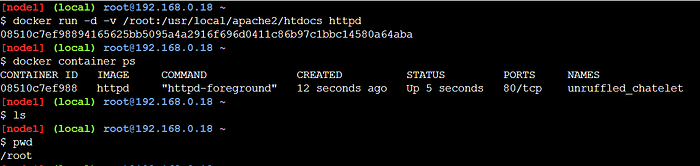
Now checking the use of the Volume, the source(host) and the destination(container) path are in sync. Whenever the container is stopped or crashed then the data in the container dir mentioned in the run command option will be synced with the host dir.
we can use mount option of the docker run command for the alternative for -v option, in 2 ways
- by creating volume before hand and the using that volume in the run command
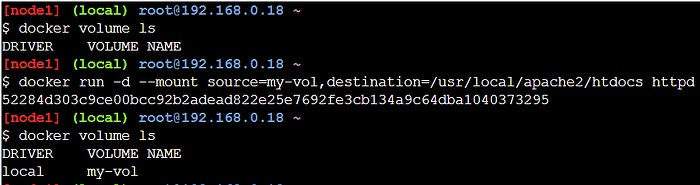
- mention the volume name in the run command directly, docker will create the volume for us.
Create volume
docker volume create <volume_name>List the volume
docker volume lsInspect the Volume
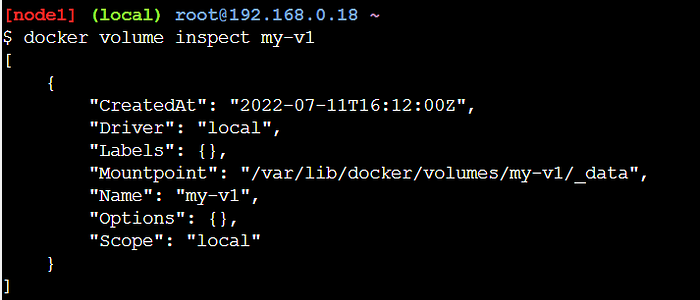
To get the path where the volume is mounted in our host machine use the inspect command
docker volume inspect <volume_name>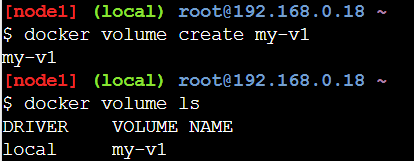
Volume in Docker run command
mouting the created volume to the container,
docker run -d --mount src=<volume-name>,dst=<container-dir-path> <img>docker run -d --mount source=<volume-name>,destination=<container-dir-path> <img>
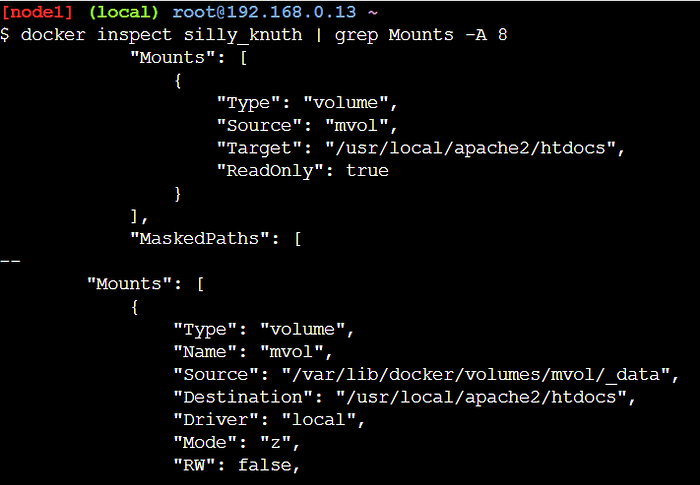
We could also specify the Readonly permission for the containers. (default permission is Read Write)
docker run -d --mount src=<volume>,dst=<container-dir-path>,ro <img>

Remove Volume
docker volume rm <volume-name>Note, the rm command will raise an error if the volume is used by any container.
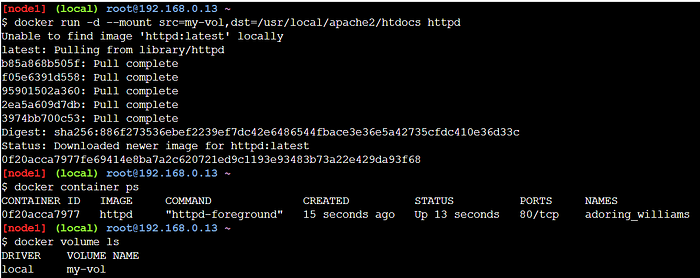
Create docker volume in docker run command
docker run -d --mount src=<volume-name>,dst=<container-dir-path> <img>If the given Volume name already exists then it will be used, if not then the docker creates the Volume with that name.
We can get the Mountpoint by using the below command to see where the data is stored in that volume.
docker volume inspect <vol-name>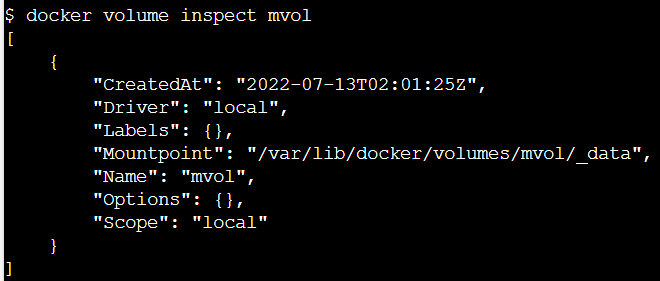
Mountpoint says the location in the Docker host machine where the data is stored using this Volume.
tmpfs mount type
We have seen how to mount the volume type to the container in the above section. We could also mount the temporary filesystems to the container.
These mounts are temporary and once the Docker container is stopped the data present on these mounts is also lost.
tmpfs mounts are stored in the host system’s memory only and are never written to the host system’s filesystem and thus does not hold data permanently.
Below images shows the Mount type as Volume.

using tmpfs type, also we can limit the filesystem size
docker run -d --mount type=tmpfs,dst=<container-dir-path> <img>
docker run -d --mount type=tmpfs,tmpfs-size=<size>,dst=<container-dir-path> <img>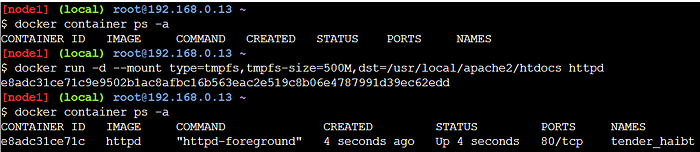
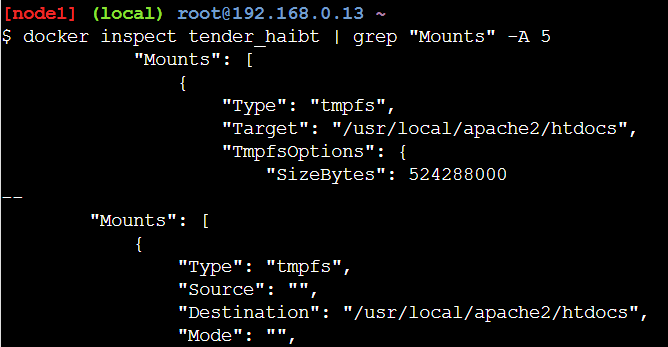
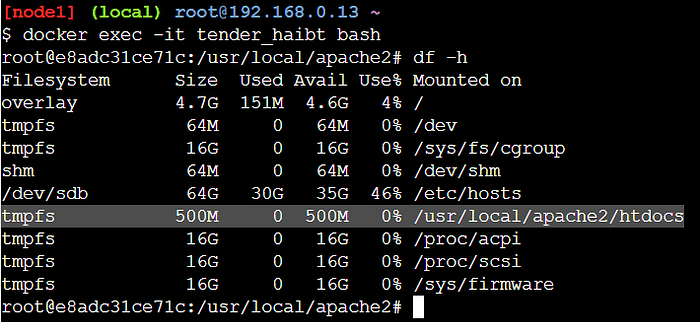
We could see that the tmpfs mount of the container dir path has limited to 500M as we specified.
Stop the container
Stop the running container
docker stop <container-name>
docker stop <container-id>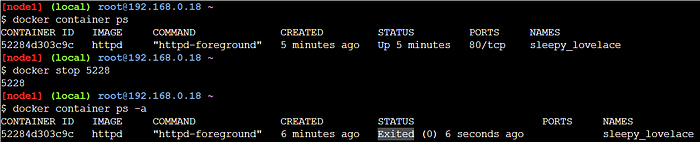
Remove the container
We can only remove the container that is stopped.
docker rm <container-name>
docker rm <container-id>
Start the container
Start the stopped container
docker start <container-name>
docker start <container-id>
Interactive shell to the container
To get the shell of the running container,
docker exec -it <container-name> bash
docker exec -it <container-id> bash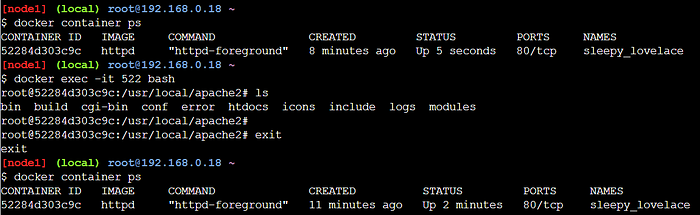
attach std in/out/err of the container
docker attach <container_name>
docker attach <container_id>
Once we exit the attach log then the container will be stopped.

Container logs
docker logs <container_name-OR-id>
We could also see the logs of the stopped container.
To follow the log output we can use the -f option
docker logs -f <container>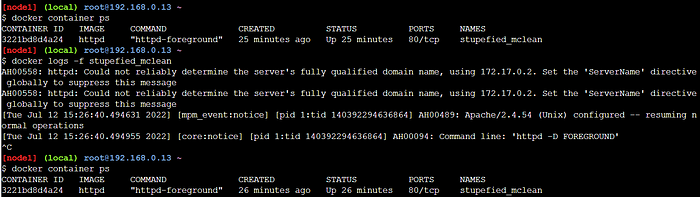
-f waits for the logs and we can also exit with ctrl+c without stopping the container.
Docker network
To list the docker networks,
docker network ls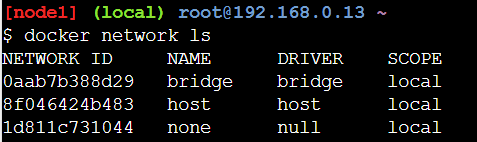
Let me start a container (by default it will use the bridge network).

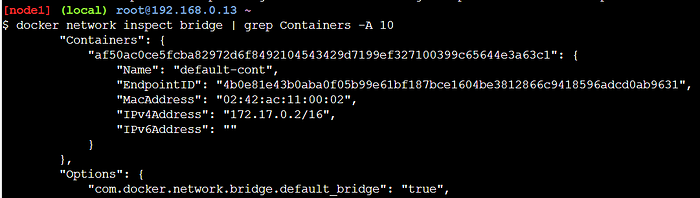
Now, inspect the network to see the containers using that network.
docker network inspect <network-name>
Here is our container using the bridge network.
The containers in the same network can communicate with eachother.
Started the second container by default it also uses the bridge network.
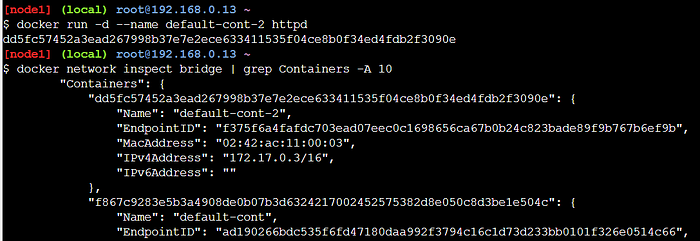
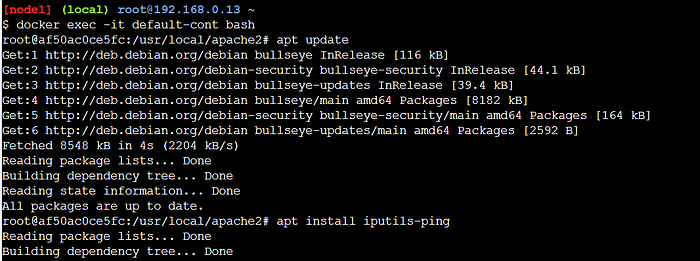
Now get the interactive shell of the default-cont
docker exec -it default-cont bashFrom this container we will try to ping the second container ip. For this we need to install the iputils-ping
Once we get the shell of the container execute the below commands,
apt update
apt install iputils-ping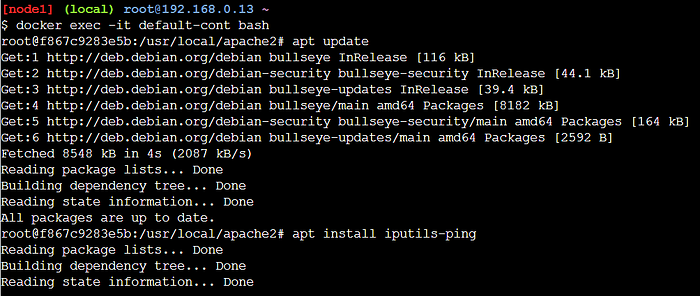
Try to ping the second(default-cont-2) container IP, got while inspecting the bridge network above.

Lets try to run two containers in 2 different network
Create network
To create the docker network
docker network create <network_name>
While creating the network, the default driver is bridge. We could change that by specifying -d option.
Starting 2 containers
- one with the default network
- another with the custom network
docker run -d --network <network-name> <img>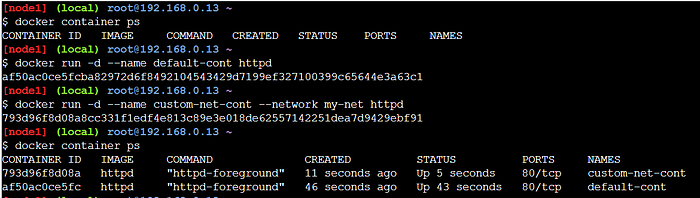
Container uses bridge network,
Container uses my-net network,
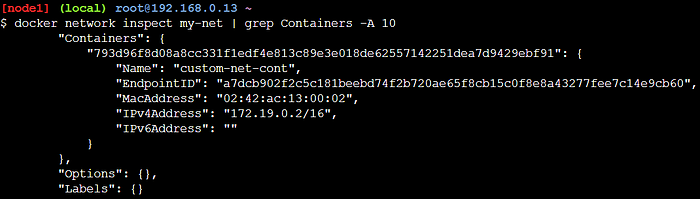
Now, lets try to ping one container from another.
Connect to the default-cont and try to ping the container on my-net network.

Sure enough the Containers are not able to communicate between the networks.
Remove network
We can remove the network only if no containers uses that network.
docker network rm <network-name>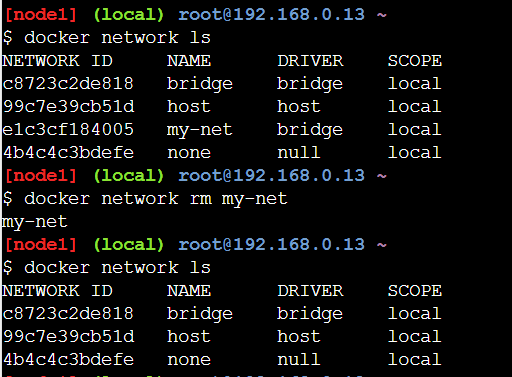
View the resource usage of the Containers
docker container statsInspect the Container
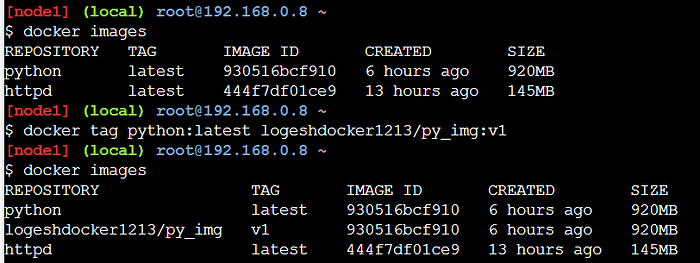
docker inspect <container_id_or_name>Docker tag
To create tag image with the source image.
docker tag <source_image:tag> <target_image:tag>
docker tag <src_image_id> <target_image:tag>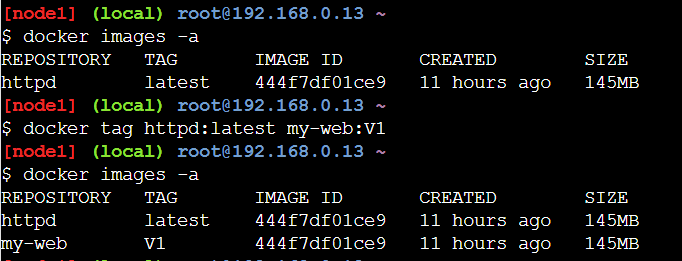
Docker system
To show the disk usage
docker system df To get the real time events
docker system eventsTo display the system info
docker system infoTo remove all the unused data
docker system prune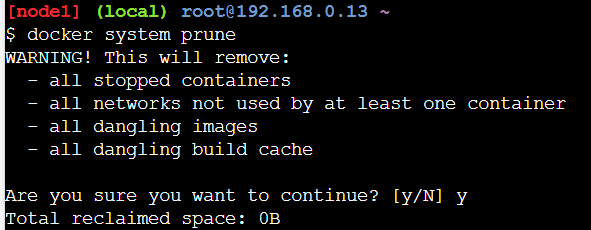
Docker build
To build an image from the Docker file.
docker build [options] <Dockerfile_path>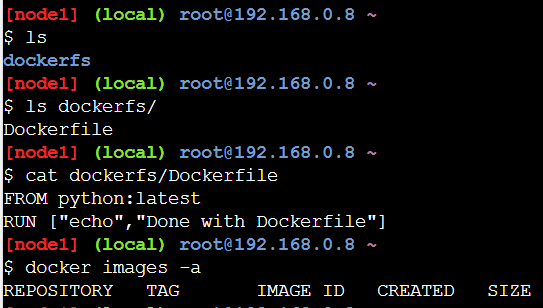

-t option is used to tag the image.

Docker login
docker loginand enter the credentials

Docker push
docker push <docker_userid>/<image:tag>I have tagged the image in the format of <DockerUserID/image_name:tag>
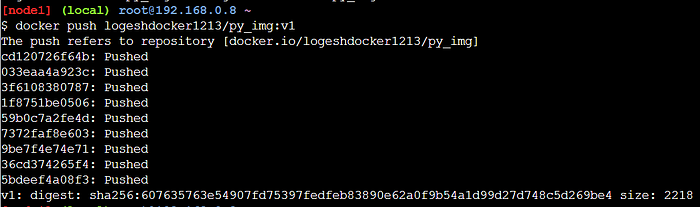
I have pushed the image of the name logeshdocker1213/py_img with the tag v1. Here logeshdocker1213 is my docker id.
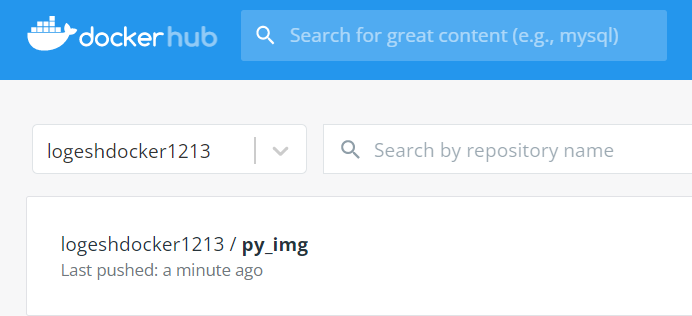
In the Dockerhub, we can find the image that we pushed.
In this article we have covered some of the Docker commands we should familiar with.
Hope you find this article informative.
Happie Learning :)
Keep Learning !!!